Recently, the folks over at Aruba sent us some demo gear of their new Instant On wireless product line. These wireless devices are positioned to be competitive in the SMB and prosumer spaces. It’s Aruba’s answer to the Ubiquiti, who has been gobbling up SMB marketspace with its very low-priced but very reliable networking gear.
Overall, we were impressed with the Aruba Instant On AP11D that was shipped to us. Check our closing comments for our final impression.
Specs
Max Data Rates : 1167 Mbps (867 Mbps 5GHz + 300 Mbps 2.4 GHz)
Wireless Protocol : 802.11ac (Wave 2)
Radios : 2.4 Ghz 802.11n (Wi-Fi 4)
5 Ghz 802.11ac (Wi-Fi 5 Wave 2)
MIMO : 2x2
Encryption Algorithm: Opportunistic Wireless Encryption (OWE), WPA2, WPA3
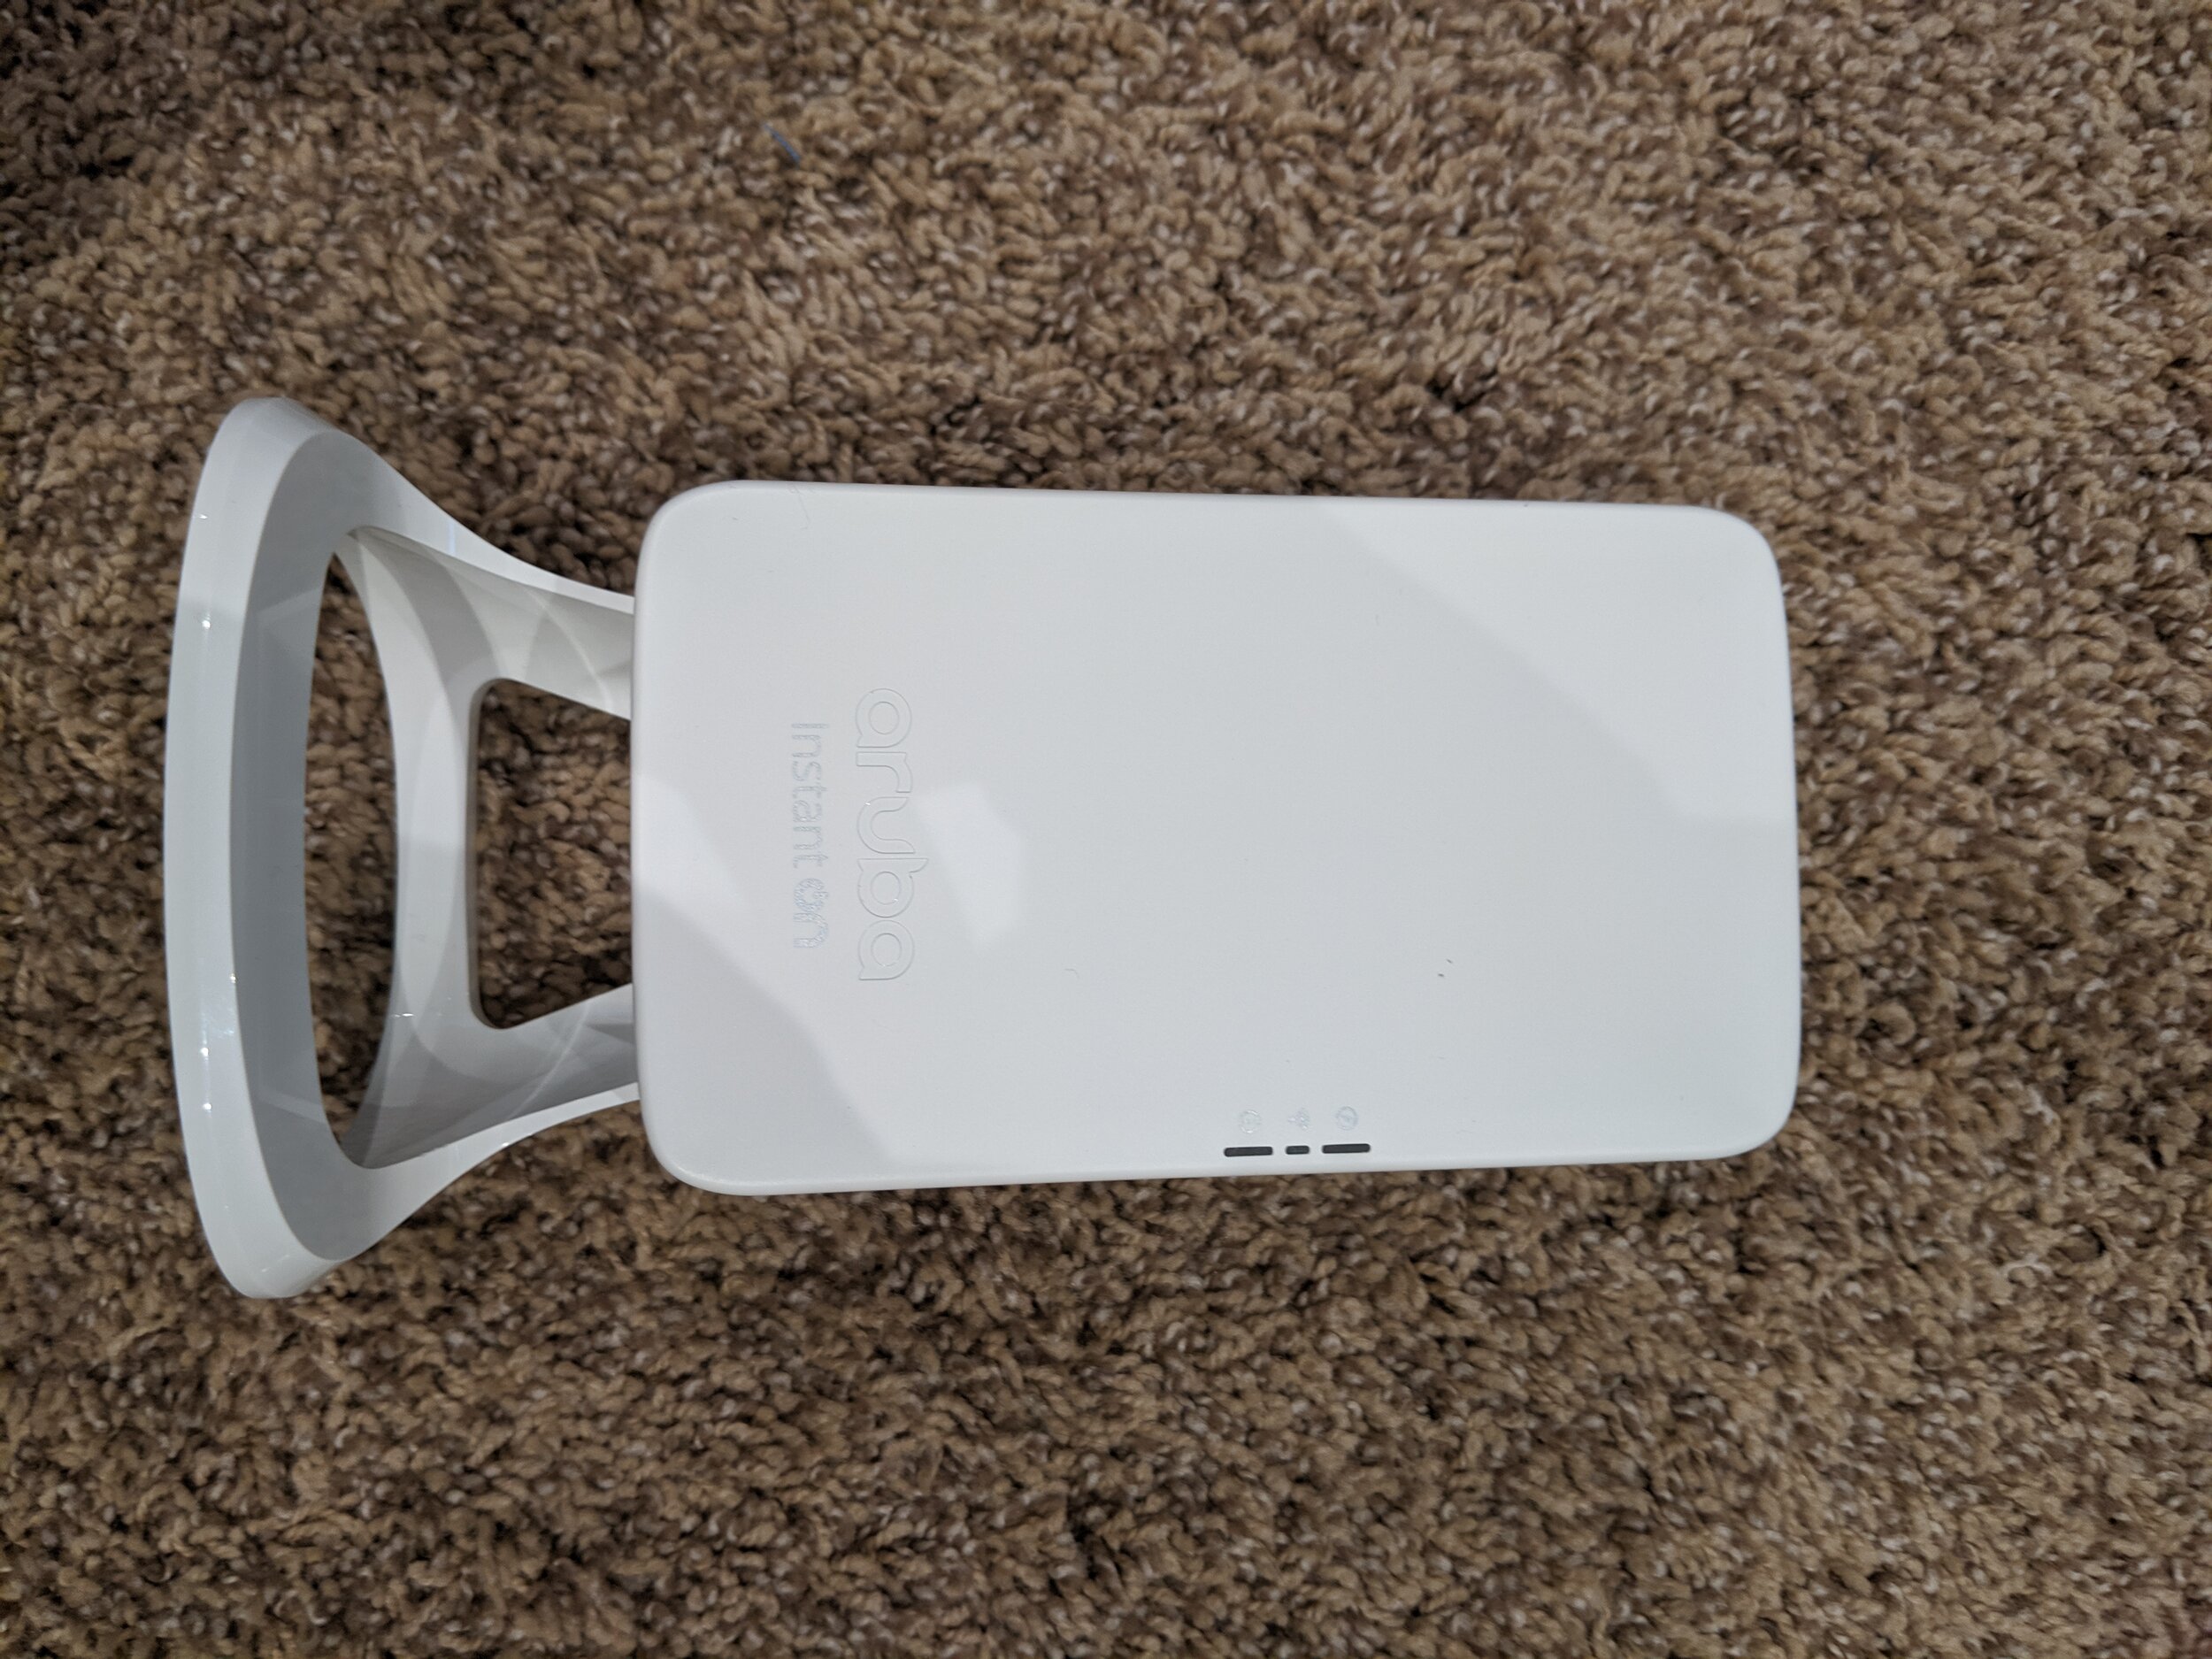
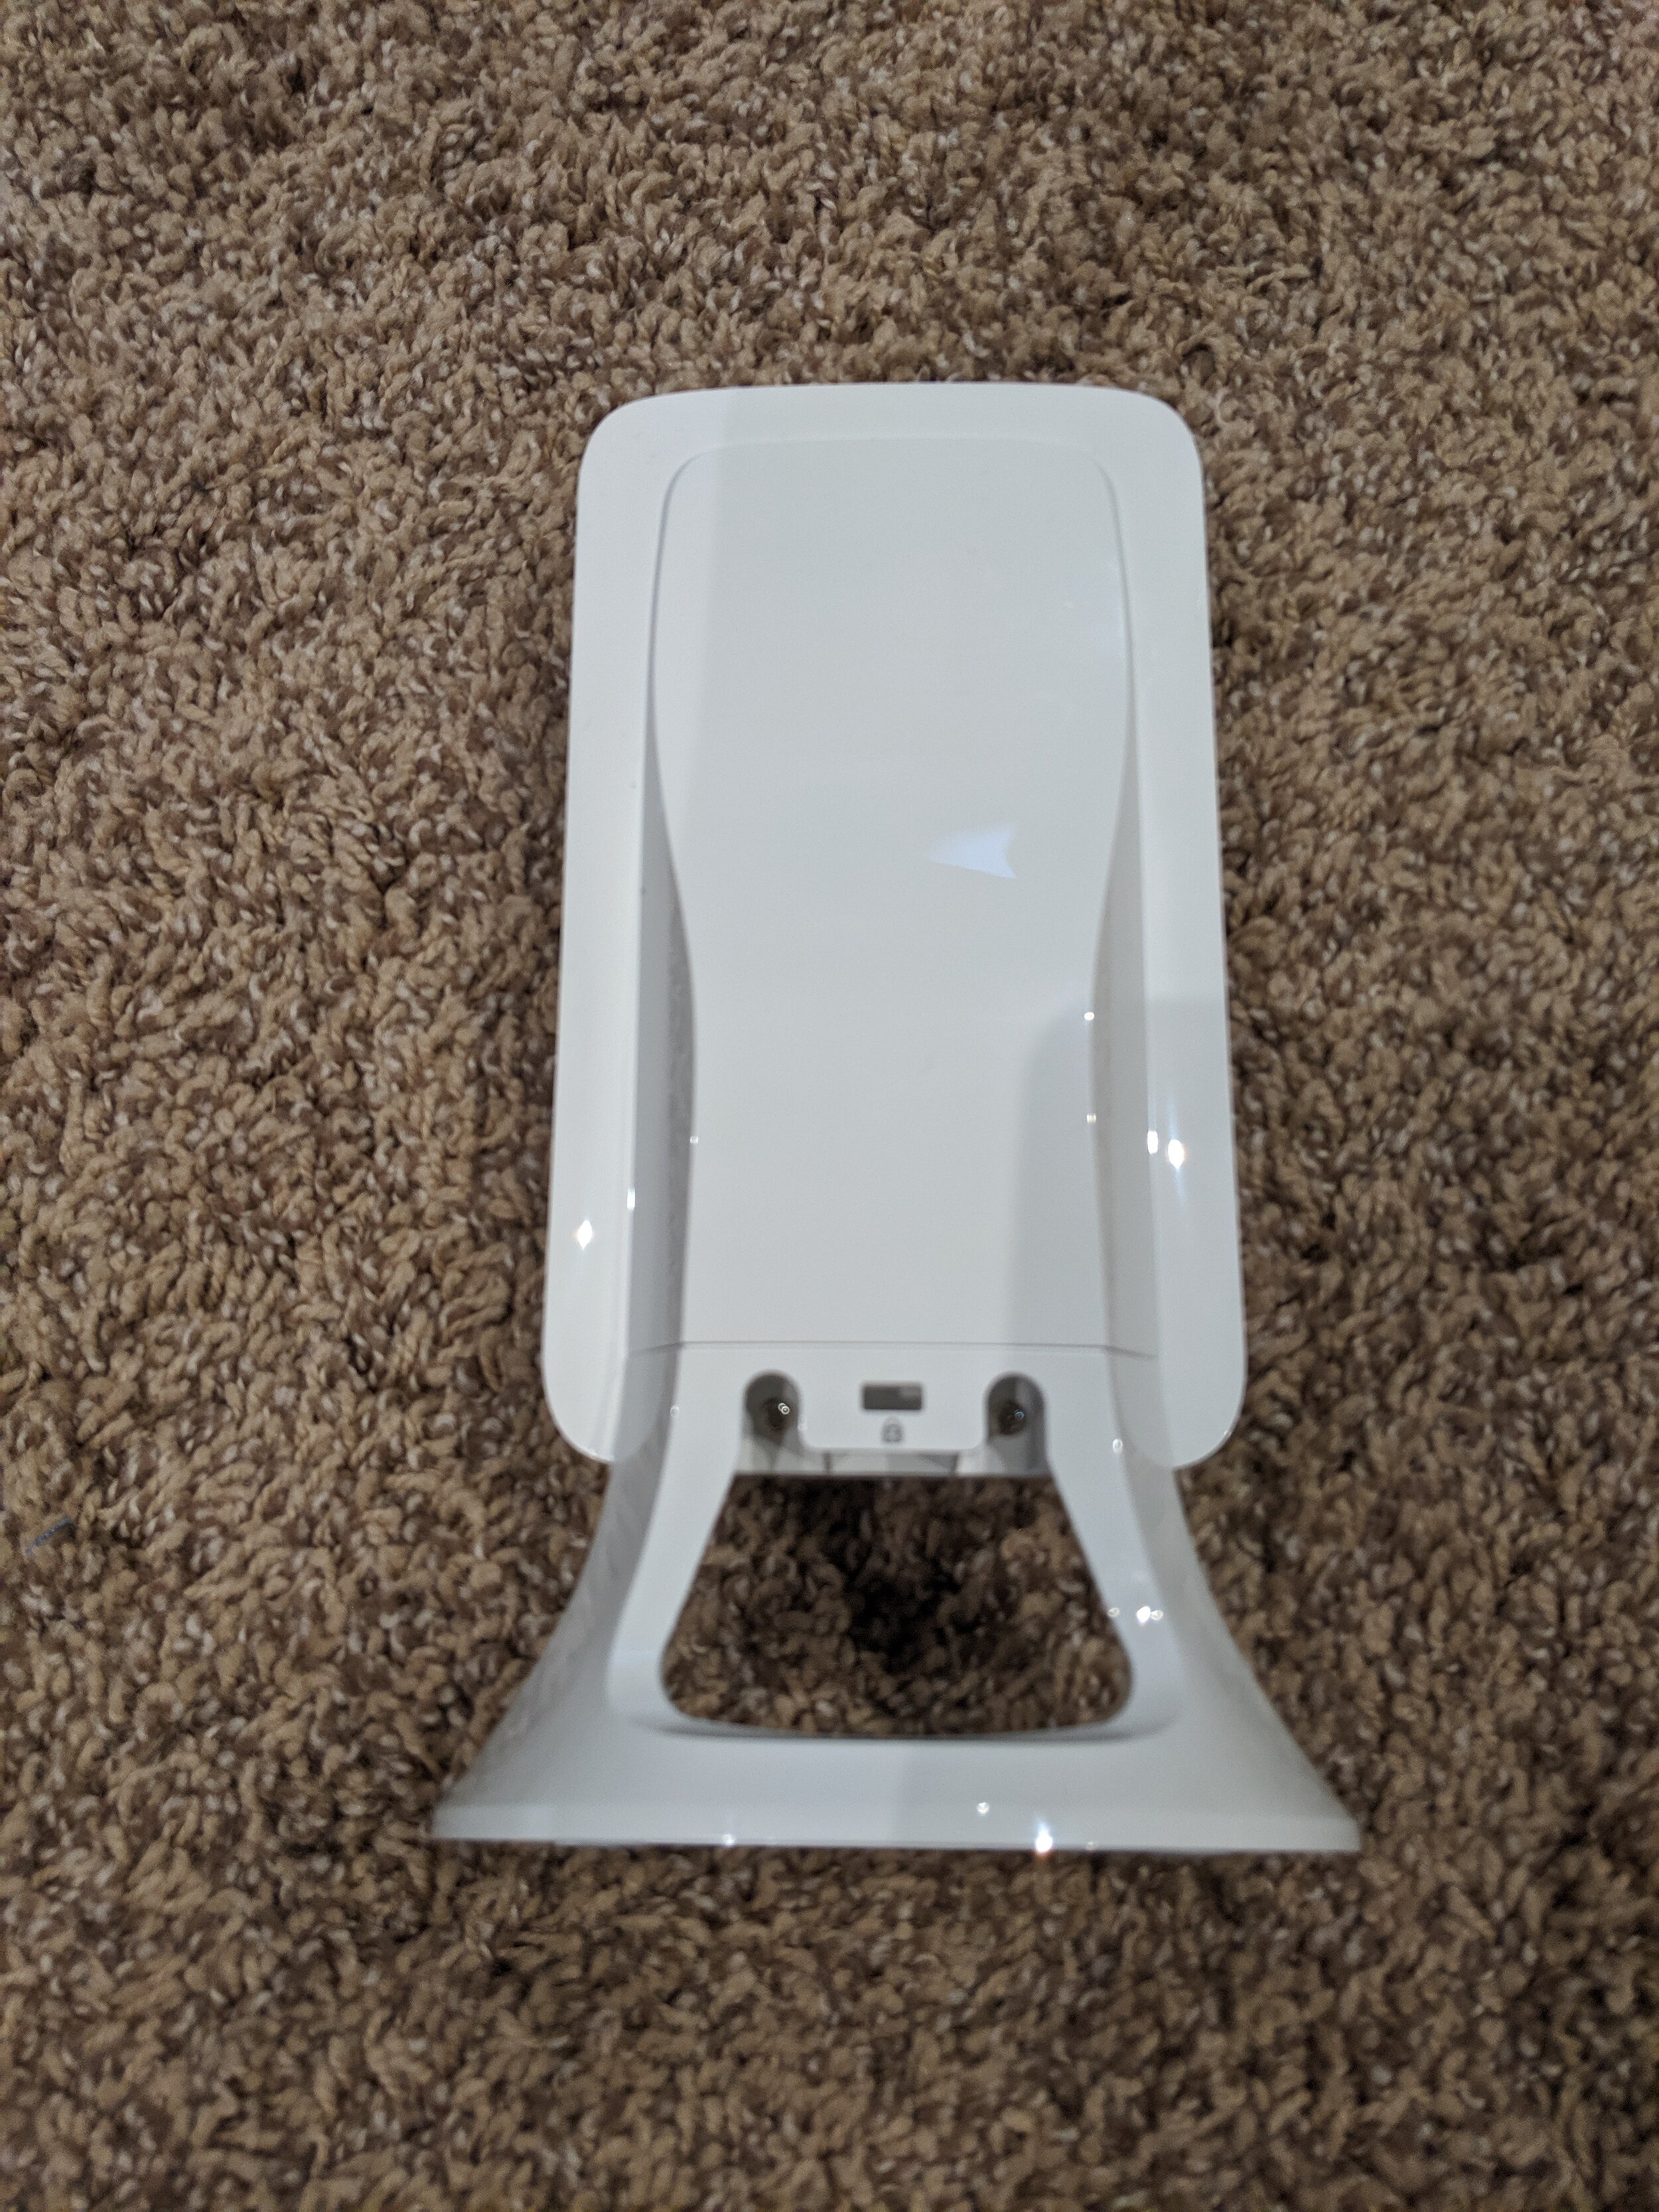
Dimension : 150mm x 86mm x 40mm
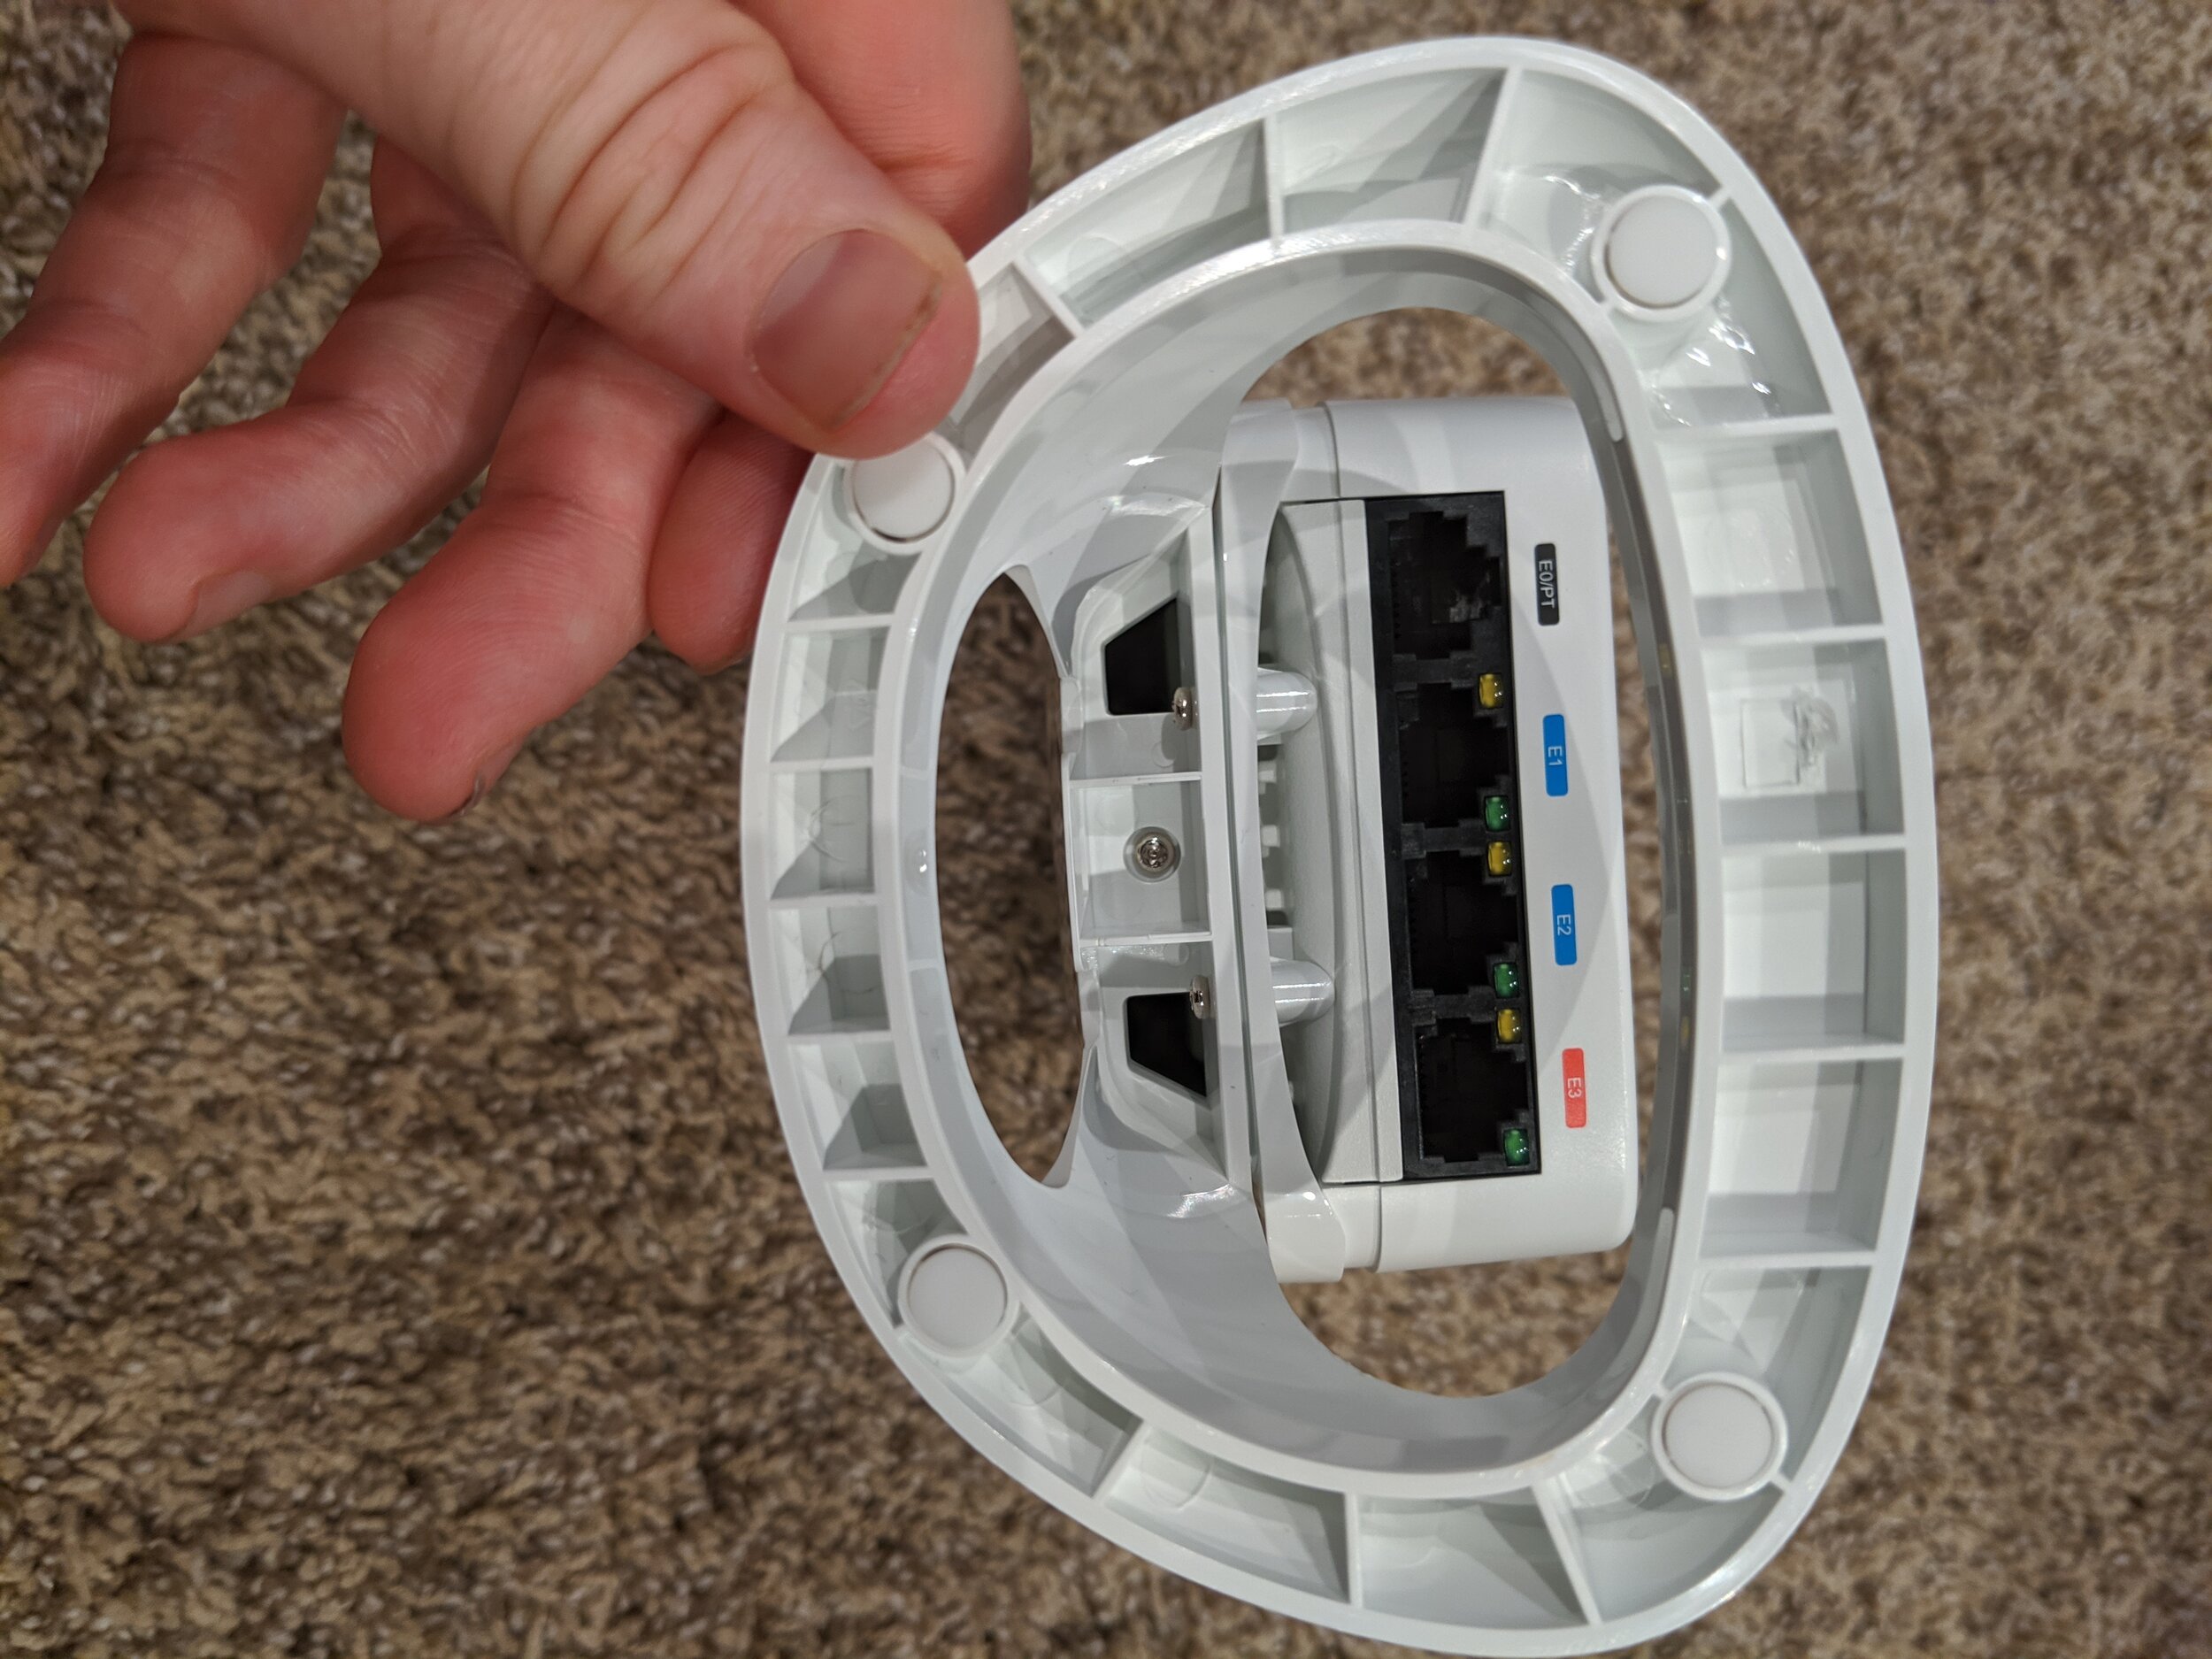
Interfaces : 1x PoE Uplink
3x Ethernet Switch
Power : 802.3af PoE or 12Vdc
Warranty / Support : 1 Year
Ideal Deployment : SOHO, Hotels, Workspaces
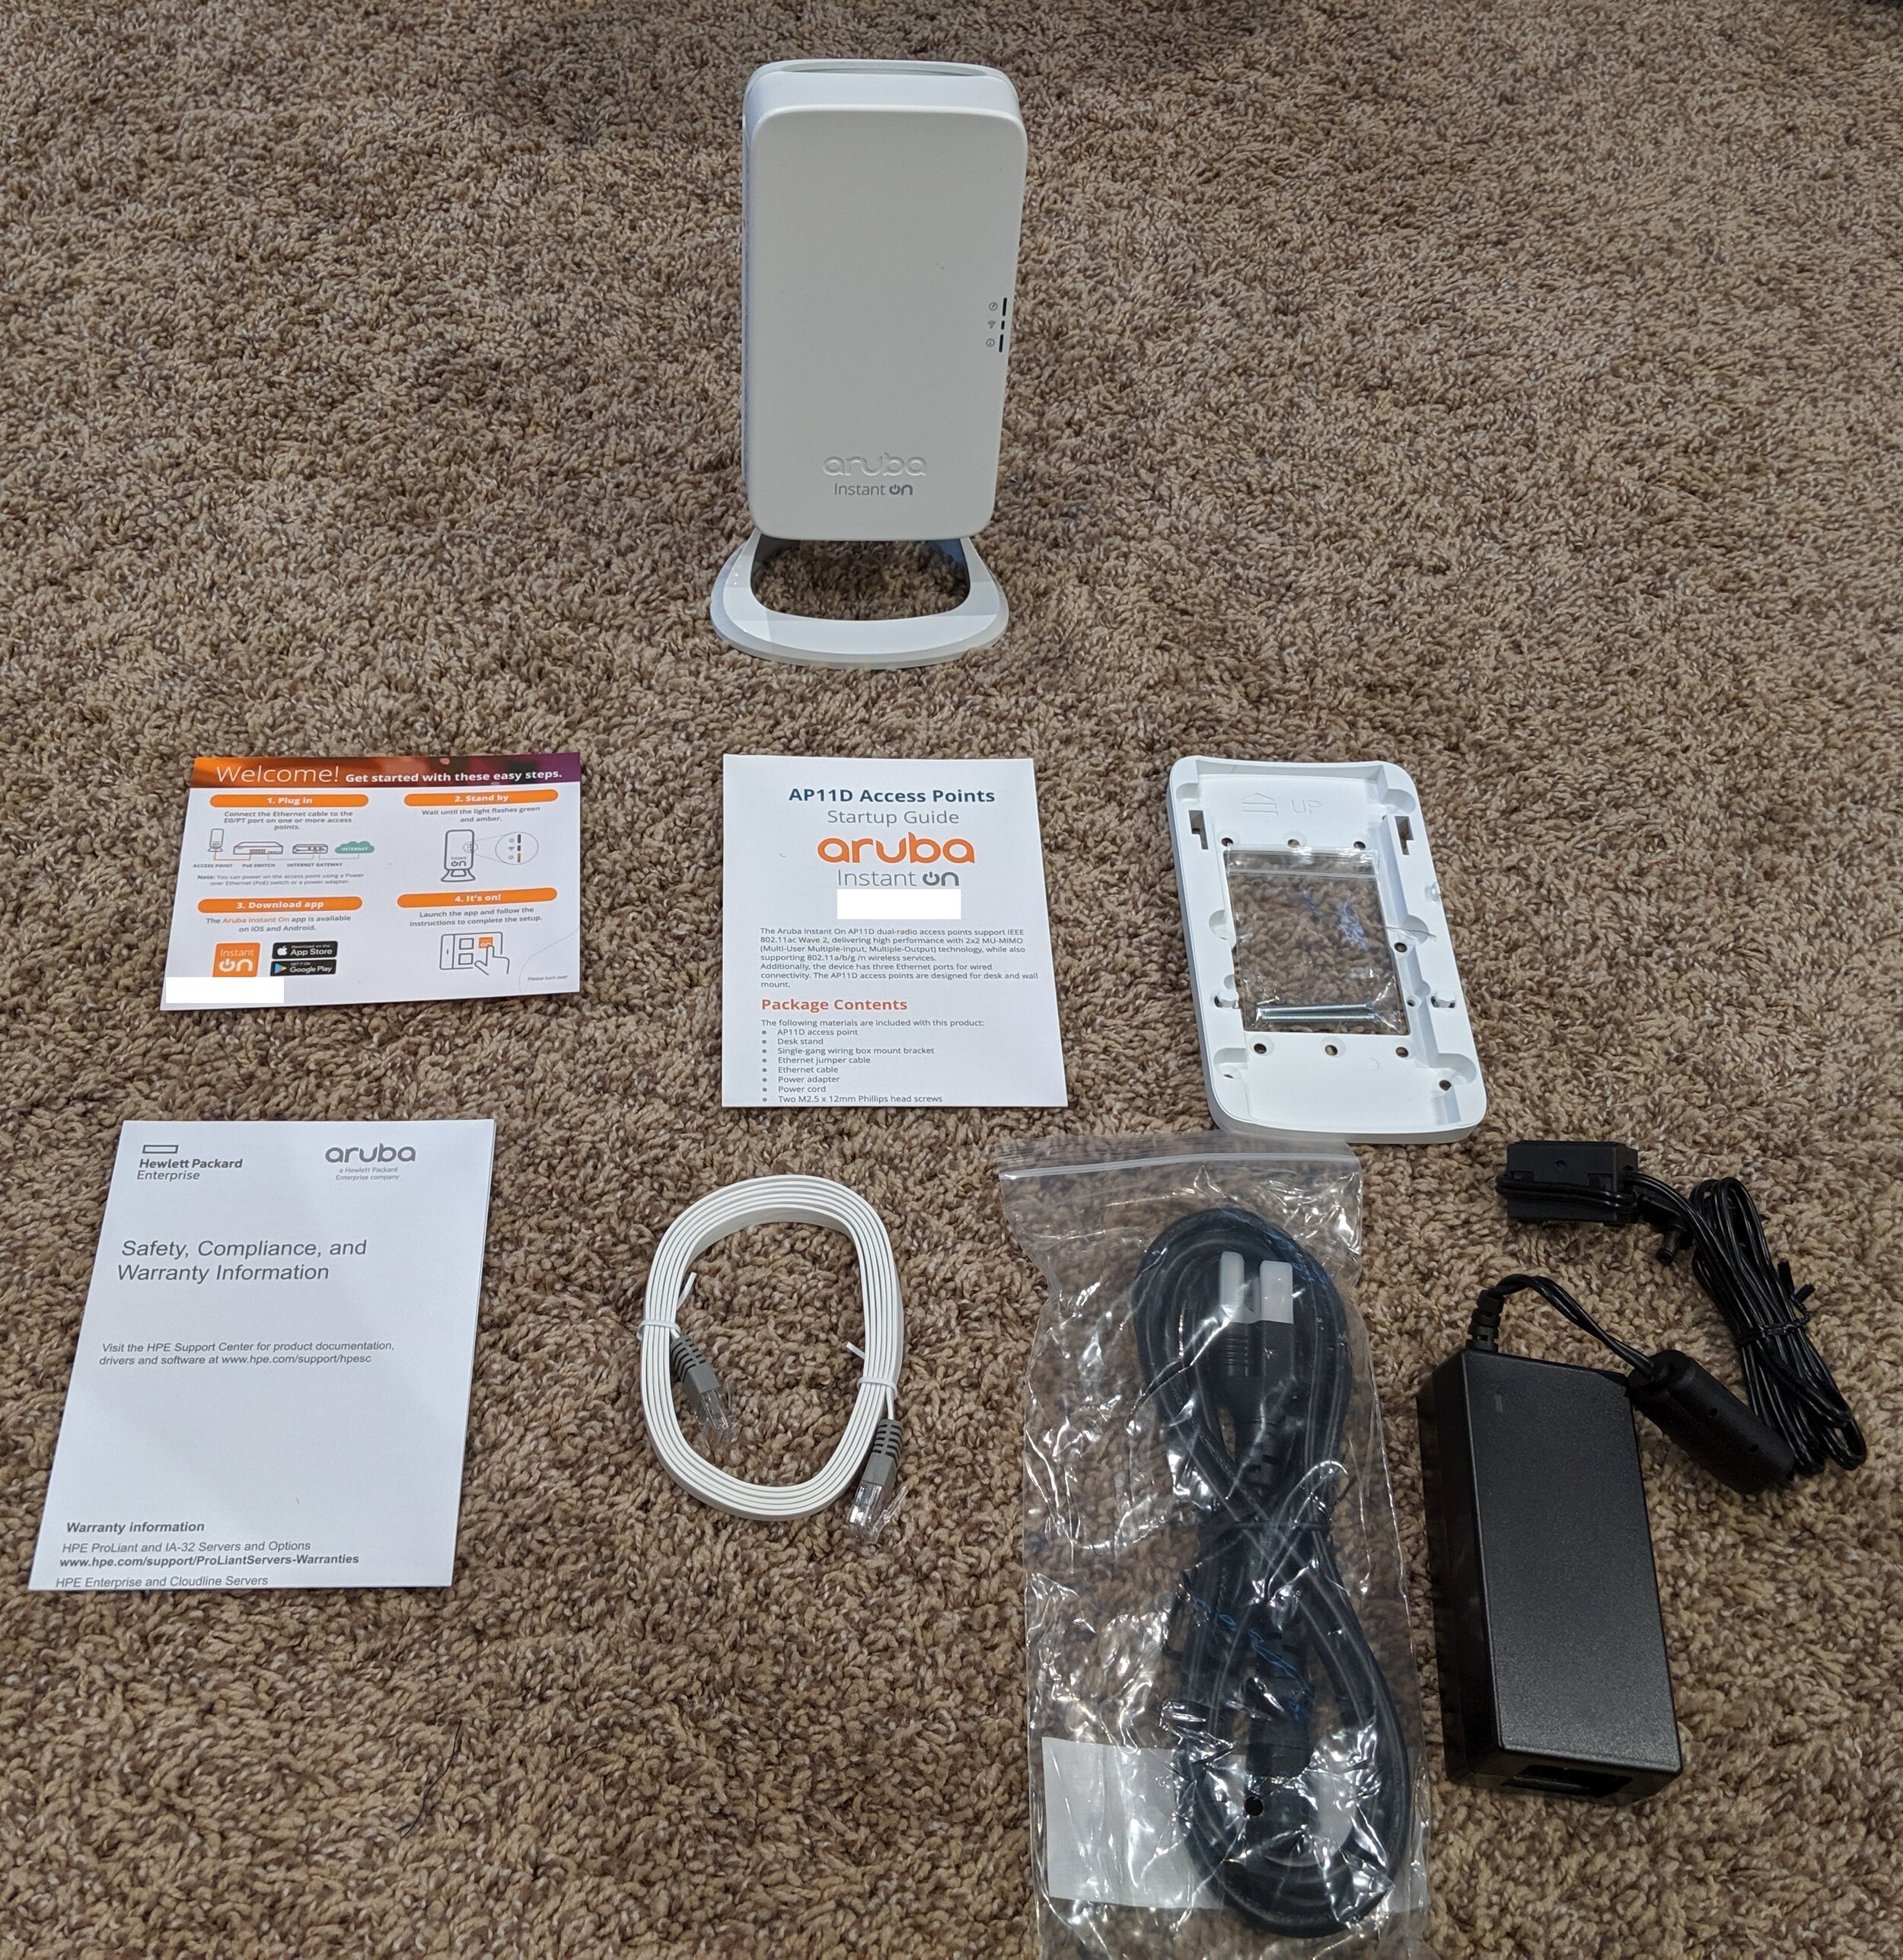
The Unboxing
In the box, we have:
AP11D Access Point
Desk Stand
Single-gang wiring box mounting bracket
Flat CAT6 cable
Power Adapter & Power Cord
Startup Guide
Welcome Card
Initial Setup
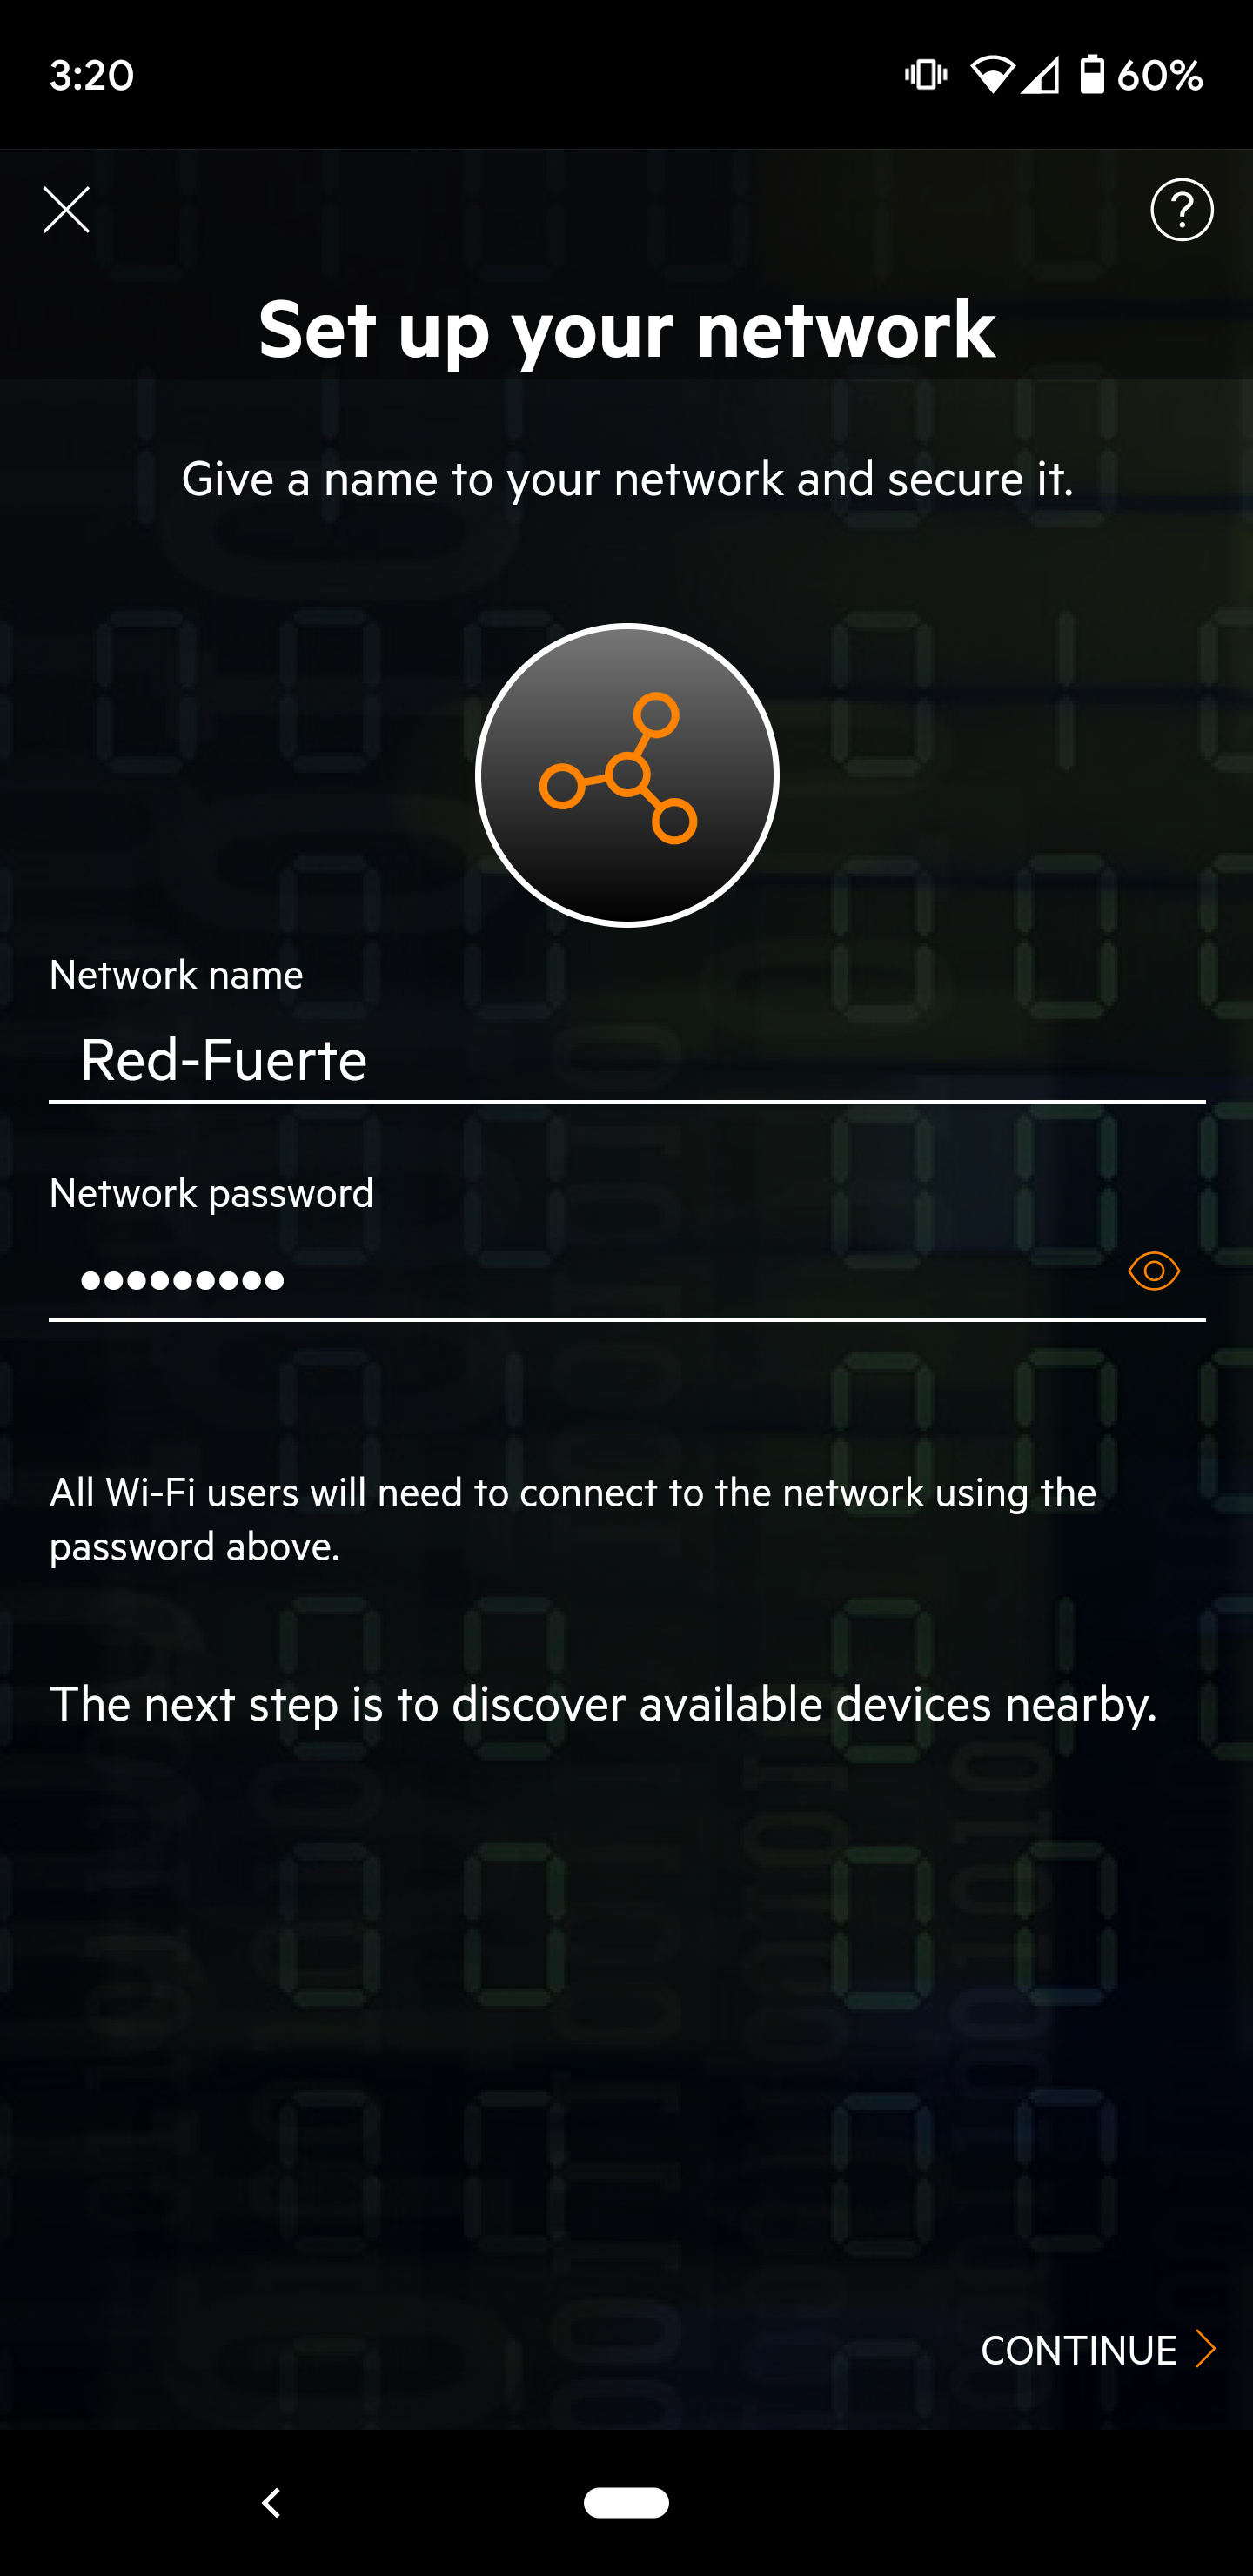
The Instant On line is setup via a smart phone app. This makes it nice for small businesses who are trying to save some cash and are fairly tech-savvy. We setup our test network within 10 minutes on a Google Pixel 3XL device. Here are some screenshots from the Google Play Store and the initial app setup.


After creating an Aruba Instant On login, the app walks you through setting up your Site, Network, and adopting any Instant On Access Points it can find. The App is able to adopt the Access Points by [1] discovering the device on the network (this will require that you already have some sort of wireless connectivity. Your phone will use the existing wireless connection to search the LAN and find the Aruba Instant on devices) or [2] your phone will pair with the Access Point using Bluetooth.


The App - Monitoring
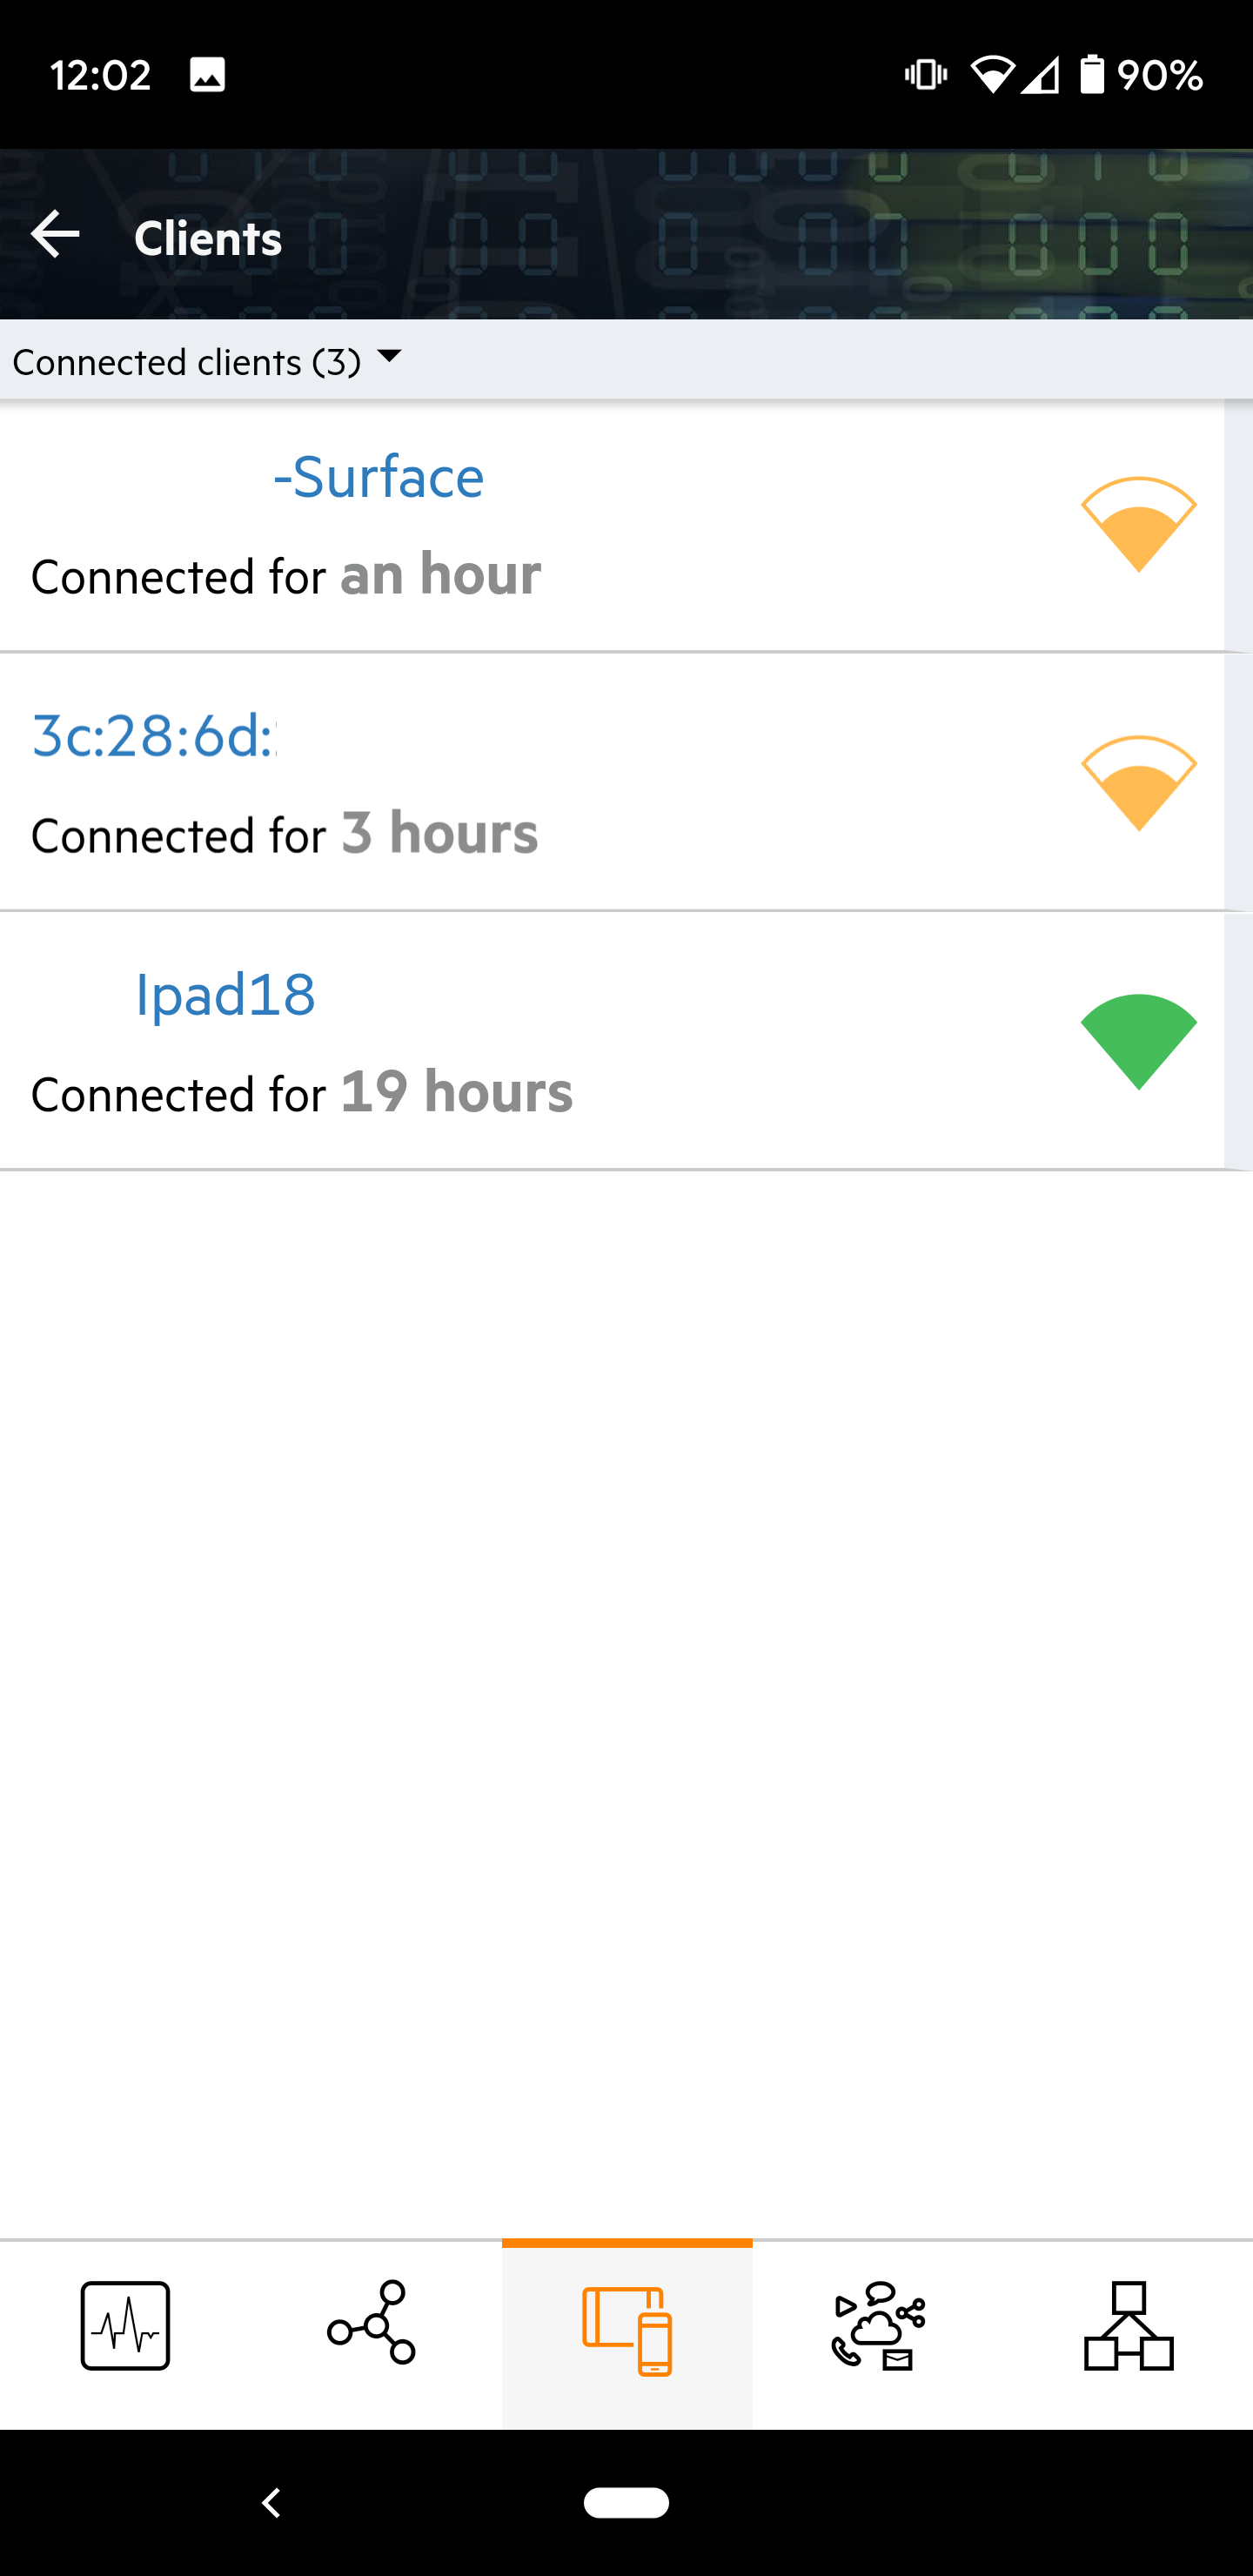
Once the network has been initially setup, monitoring the network is very easy inside the Instant On App. The application does a good job of presenting information on the overall network health, client connection statuses (including signal strength), and application traffic utilization.
Here are the base menus:


Digging into the monitoring data a little more we’re able to extract some more information about how our clients are connecting, what kind of traffic is traversing our wireless network, and who is generating it.
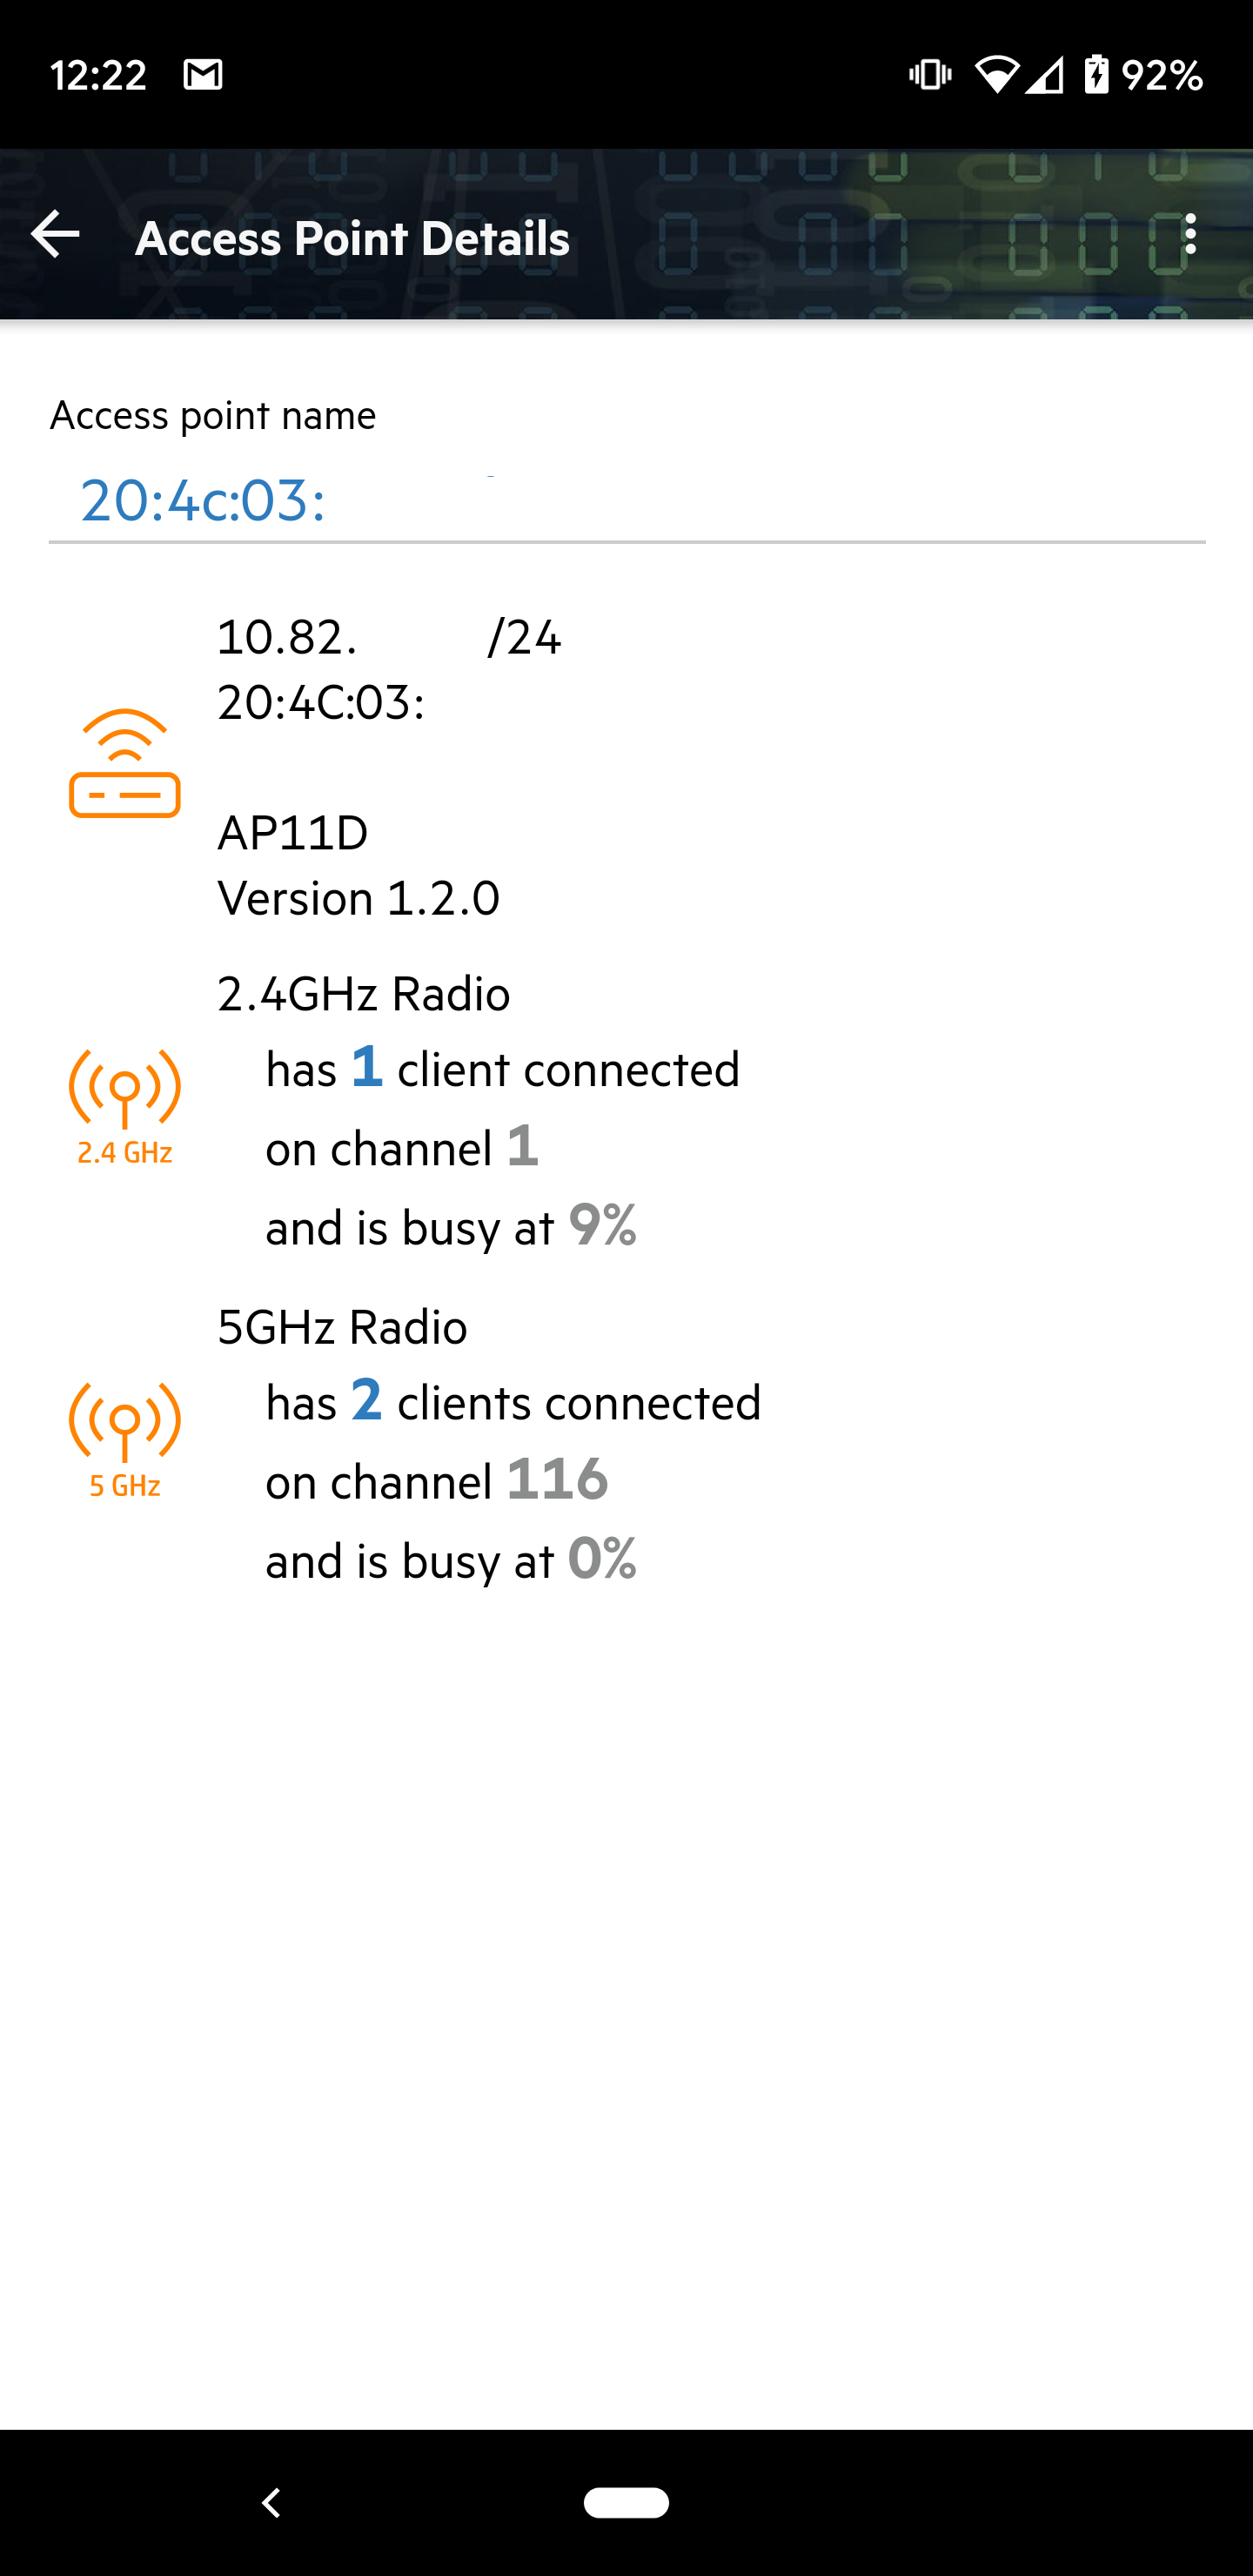
The first screenshot presents us with useful information on how our bands and channels are being utilized. We can see exactly how many clients are connected to each band, and how utilized/busy each band is. This is useful for tracking down over-saturated AP’s and channels, and then being able to address the issue.
The second screenshot gives us global traffic information. These categories are not definable so you have to rely on Aruba’s judgement on how the traffic should be classified. We see in this case that 60% of the traffic is related to Internet tools, whatever that means.
The third, fourth and fifth screenshot shows an Android, Apple iPad, and Windows device and their connection details. We can see exactly how much data each client is send/receiving, to which Access Point they are connected, and their overall connection quality.
The final screenshot shows traffic analysis specific to a single client. In this screenshot we see a Windows client who has transferred over 500MB of data within the past 24 hours.


The App - Configuration
Configuration of the access points is very simple. Anyone who has installed a home wireless router will be able to get their wireless network up and running with little fuss. The Aruba Instant On supports the following advanced features:
WPA 3
RADIUS Authentication
VLANs
Network Address Translation (NAT)
Network Access Scheduling
Bandwidth Throttling


Summary
Our initial impression that the Aruba Instant On AP11D was not a good one. We were initially turned off by the desk mount. Our initial impression was this was no better than any SOHO router you could pick up at your local Walmart or Best Buy. However, our initial impression was very, very wrong. The desk mount makes a lot of sense for SMB and prosumer customers. In fact, we even ended up using the desk mount in our installation to provide wireless + 3 switch ports to our workbench.
We absolutely love the single gang mount. This makes a lot of sense for applications such as hotels where you can provide in-room wireless and at the same time 3 additional wired connections. It also has fantastic SMB / home uses where multiple connections may be desirable in a single area (e.g. common works pace, behind an entertainment center, etc)
If Meraki and Ubiquiti had a child, this would be it. It has all the pro’s of each. It is cloud managed without all of the crazy-expensive Meraki licensing. Once you buy it, you own it; which is very desirable for SMB and home customers who don’t want to be tied to a subscription that they really are not going to use. The one year warranty is sufficient for these smaller customers, and the access points are cheap enough that if one breaks after the warranty period, it’s not painful to pick up a replacement.
The configuration and support options are a bit limited for an enterprise product. We would not recommend deploying these in an environment where these features become more necessary. However, for smaller businesses this is a very simple and affordable wireless option that we would not hesitate to deploy.